Friday, March 18, 2016

Configuring Shared Mailbox Microsoft Dynamics CRM Online and Exchange Online

Many of us have sent emails to support team for any issue related to any product, services etc. Business has their dedicated or shared customer support that respond to the customer queries through emails, phone, fax etc. 


Business asks you to design customer support for their product and services. Business will provide a support email to all there valuable customers. Customers will send queries and concerns on this support email. That will be queued in Microsoft Dynamics CRM and assigned to dedicated members of a team (round robin) for handling requests and respond to customer's email with a solution or escalate the issue further. In the entire process the employee/members can send email through their individual mailbox or by support mailbox.


Mailbox and CRM Queue


Configure Shared Mailbox

Administrators can configure or create shared mailboxes in exchange on-line.


Shared Mailbox - Exchange On-line


Enter name, email address and Members (who monitor and send email from this shared mailbox).


Configure Queue Microsoft Dynamics CRM

Create a queue in Microsoft Dynamics CRM.
Shared Queue Configuration


Shared mailbox and Incoming email id should be same. "Convert Incoming Email to Activities" option will convert the incoming emails to email activity in CRM system.

Configure Queue Mailbox Microsoft Dynamics CRM

Configure queue mailbox for incoming emails


Shared Mailbox Configuration


Both Incoming and Outgoing Email synchronization method should be "Server Side".

Click Save, Approve Email and Test and Enable Mailboxes.

Send Email To Shared Mailbox

Email send to Shared Mailbox

Track Send Email In Shared Queue

Email will be synchronized in Shared Queue. 

Receive email added as Queue item

Open email activity from shared queue, here user has can reply to that email by their email id or they can select Shared Queue email address in "From" look up field.

Reply from User Mailbox


Reply from Shared Mailbox

Incoming emails are converted to activities in CRM system. Activities can be assigned to user(s)/member(s) either manually or through any automated process. 


Thursday, March 17, 2016

Configuring Forward Mailbox in Microsoft Dynamics CRM and Exchange Online


For incoming emails you can use either of mailbox configuration.

  • Individual Mailbox - Each CRM user has its own incoming and outgoing server synchronization set up.
  • Forward Mailbox- A centralized mailbox at exchange, CRM monitors this mailbox for incoming messages. And all CRM user's mailbox monitors this Forward mailbox.
Forward mailbox reduces administrative effort. To configure forward mailbox, adminstrators would require to do configuration (Create rules to send incoming emails to Centralized mailbox) both at Exchange and CRM end.


Configuration Exchange On-line


In the above diagram, Mailbox 1, Mailbox 2 and Mailbox 3 have rules on incoming emails, if rule condition matches then incoming email is forwarded as attachment to Mailbox 4.


Rule - Exchange Online


Configuration Microsoft Dynamics CRM

Add Forward Mailbox

Go to Settings, Email configuration.then click mailboxes. Click Add new forward mailbox. 


*Note: 

  • Email address will be your exchange email address (Mailbox that receives all the forwarded emails)
  • Server Profile should be Microsoft Exchange Online (If exchange is hosted in office 365)
  • Incoming Email should have server side synchronization. 
  • Forward mailboxes does not have Outgoing email synchronization. It should be set "None"

Click Save, Approve Email and Test and Enable Mailboxes.


Update User Mailbox - Change Synchronization Method (Incoming Email)

Open any existing user mailbox and change incoming synchronization from "server side synchronization" to "forward mailbox".


Click Save and Test and Enable Mailboxes.

Now you are all set to receive emails from forward mailbox in MS CRM. 


Monday, March 14, 2016

Microsoft Dynamics Event Execution Pipeline

Every action in Microsoft Dynamics CRM subscribes to an event. Every action perform on CRM client are handled by Organization web service, which is part of CRM server. There are ways to extract data from dynamics CRM. Example

1. Web API
2. Organization Data Services (Deprecated in 2016)
3.  Organization Service - SOAP endpoints

Each of these methods are wrapper to fetch CRM data which internally linked to the CRM server organization web service. 


When any event is raised in CRM system, Server generates Organization web service request message which is then passed to series of stages. Stage 10 Pre-Validation, stage 20 Pre-Operation and stage 40 Post-Operation are only available for the Plug-in registration.

Any WEB API HTTP request to update a property of an entity will be internally catered by Organization web service. 


In the above flow, organization request passes from stage 10 to stage 40, each of the stage has significance and can update the organization message accordingly.

Stage 10: Pre-Validation: Use this stage when to perform any task prior to any security check. An example, transaction amount should be greater than $500. If user has entered any  value in transaction amount field which is less than expected value then the whole execution process should be aborted. Also Stage 10 is not part of database transaction, any create, update or delete operation perform on any entity will not roll back in case any exception raised in stage 20, 30 and 40. 

Stage 20: Pre-Operation: Use this stage when you want to perform any operation before the main operation in database transaction. An example, you want to log some analytic data in custom entity before main operation performs. However you want any exception in Main operation will also roll-back custom entity record. 

Plug-in code in pre-operation runs under the security context of the user (Calling, Adminstrator, System etc). In case user does not have permission on entity, properties or entity images, then the process will be aborted and exception will thrown by system.

Stage 30: Main Operation: You cannot register Plugins in this stage, this is reserved for system core operation. Main operation executes in the context of impersonated user. In case impersonated user doesn't have sufficient privileges, the core system operation will be aborted and exception will be thrown.

On successful execution, an organization response message will be generated and passed to the next stage.

Stage 40: Use this stage when to perfom any operation after the main operation. An example, whenever an account is created it must be assigned to some agent. So account has been created in stage 30, and response message will be having GUID value populated in ID field. You can use this id value and assign it to some agent.

*Stage 20, 30 and 40 executes in database transaction. Any exception in either of stage will roll-back the whole transaction i.e. error in stage 40 will roll back stage 30 and stage 20 operations. However any operation performed in stage 10 will not roll back.

The final response message is send back to the client. 

Tuesday, November 17, 2015

Microsoft Dynamics CRM Querying Data - QueryByAttribute


Same like QueryExpression, QueryByAttribute is also derived from QueryBase class and is used to fetch CRM data. 

When to use QueryByAttribute?

Let me explain QueryByAttribute logic with the help of SQL Query.

1. When your query is quite simple e.g (Select Name, Age, Salary from Account where Age=20 and Salary = 5000).

2. When you want to get data for single entity say "account", "contact" etc (Inner/Outer Joins not supported) at a time.

3. Does not support OR condition, it only supports AND Condition. e.g. If you want to achieve (Select Name, Age, Salary from Account where Age=20 OR Salary = 5000) which is not possible through QueryByAttribute.

4. Only Equal Operator is supported e.g (Select Name, Age, Salary from Account where Age>20 AND Salary = 5000), Age>20 condition is not be supported in QueryByAttribute.

5. It must have one AttributeValue specified e.g (Select Name, Age, Salary from Account) will throw exception, since there is no where clause specified.

6. Supports Pagination (both backward and forward) and Ordering

Sample Code
Suppose we have a requirement where we have to fetch firstname and lastname of accounts where it belongs to city Redmond and firstname should be in descending order. The same requirement will be written in SQL Query given below.

Select name, accountnumber, address_city from account where address1_country="U.S." order by name desc

The same query logic in QueryByAttribute.


Example: Without Pagination

QueryByAttribute myQuery = new QueryByAttribute("account");
myQuery.ColumnSet = new ColumnSet("name", "accountnumber", "address1_city");
myQuery.AddAttributeValue("address1_country", "U.S.");
myQuery.AddOrder("name", OrderType.Descending);

EntityCollection resultset= orgproxy.RetrieveMultiple(myQuery);

  foreach (Entity acct in resultset.Entities)
      {
Console.WriteLine("AccountName:{0} \t AccountNumber: {1}\t City: {2}", acct.GetAttributeValue<string>("name"), acct.GetAttributeValue<string>("accountnumber"), acct.GetAttributeValue<string>("address1_city"));
       }


Example: Pagination


QueryByAttribute myQuery = new QueryByAttribute("account");
myQuery.ColumnSet = new ColumnSet("name", "accountnumber", "address1_city");
myQuery.AddAttributeValue("address1_country", "U.S.");
myQuery.AddOrder("name", OrderType.Descending);

//Pagination logic
myQuery.PageInfo = new PagingInfo();
myQuery.PageInfo.Count = 3;//Display 3 Records in a page
myQuery.PageInfo.PageNumber = 1;//Starts from page 1           
myQuery.PageInfo.PagingCookie = null;

        
    while (true)
          {
                // Retrieve the page.
                EntityCollection resultset = orgproxy.RetrieveMultiple(myQuery);
                if (resultset.Entities != null)
                {
                    // Retrieve all records from the result set.
                    foreach (Entity acct in resultset.Entities)
                    {
                        Console.WriteLine("AccountName:{0} \t AccountNumber: {1}\t City: {2}", acct.GetAttributeValue<string>("name"), acct.GetAttributeValue<string>("accountnumber"), acct.GetAttributeValue<string>("address1_city"));
                    }
                }            

                // Check for more records, if it returns true.
                if (resultset.MoreRecords)
                {
                    Console.WriteLine("\n****************\nPage number {0}\n****************", myQuery.PageInfo.PageNumber);
                 
                    // Increment the page number to retrieve the next page.
                    myQuery.PageInfo.PageNumber++;

                    // Set the paging cookie to the paging cookie returned from current results.
                    myQuery.PageInfo.PagingCookie = resultset.PagingCookie;
                }
                else
                {
                    // If no more records are in the result nodes, exit the loop.
                    break;
                }
            }


Monday, November 2, 2015

Microsoft Dynamics CRM getting organization(s) endpoint

Microsoft Dynamics CRM Online gives you options for segregating your CRM data and user access. For most companies, adding and using multiple instances in your subscription provides the right mix of functionality and ease of management. Enterprises with separate geographic locations might consider using multiple tenants to separate Microsoft Dynamics CRM Online licenses. Multiple instances can share users among instances; multiple tenants cannot.

In order to get instances (Organization) configured in your account we use discovery service. Discovery service provides the organizations that are available on your Microsoft Dynamics Server. It uses SOAP protocol. 

Given below list of discovery service (Online) hosted by Microsoft for different geo locations.

LocationDiscovery Web service URLIdentity Provider
North America
https://dev.crm.dynamics.com/XRMServices/2011/Discovery.svc
Microsoft account
https://disco.crm.dynamics.com/XRMServices/2011/Discovery.svc
Microsoft Office 365
North America 2
https://disco.crm9.dynamics.com/XRMServices/2011/Discovery.svc
Microsoft Office 365
Europe, Middle East and Africa (EMEA)
https://dev.crm4.dynamics.com/XRMServices/2011/Discovery.svc
Microsoft account
https://disco.crm4.dynamics.com/XRMServices/2011/Discovery.svc
Microsoft Office 365
Asia Pacific Area (APAC)
https://dev.crm5.dynamics.com/XRMServices/2011/Discovery.svc
Microsoft account
https://disco.crm5.dynamics.com/XRMServices/2011/Discovery.svc
Microsoft Office 365
Oceania
https://disco.crm6.dynamics.com/XRMServices/2011/Discovery.svc
Microsoft Office 365
Japan (JPN)
https://disco.crm7.dynamics.com/XRMServices/2011/Discovery.svc
Microsoft Office 365
South America
https://disco.crm2.dynamics.com/XRMServices/2011/Discovery.svc
Microsoft Office 365
For On-Premise the URL would be: 
http://ServerName/XRMServices/2011/Discovery.svc

Code to get organization endpoints for all the instances configured in Microsoft Dynamics CRM Online.

string discoveryURL = https://disco.crm5.dynamics.com/XRMServices/2011/Discovery.svc";                 
          
//Pass your online account credentials           
ClientCredentials credentials = new ClientCredentials();
credentials.UserName.UserName = "abhishek@xxxxxxxxx.onmicrosoft.com";
credentials.UserName.Password = "xxxxxxxxxxx";

//Create discovery service proxy
DiscoveryServiceProxy dsp = new DiscoveryServiceProxy(new Uri(discoveryURL), null, credentials, null);
dsp.Authenticate();
          
//Retrieve Organization details
RetrieveOrganizationsRequest orgRequest = new RetrieveOrganizationsRequest();
RetrieveOrganizationsResponse allOrgs = (RetrieveOrganizationsResponse)dsp.Execute(orgRequest);
//Print all organization(s)(instances) endpoint.
foreach (OrganizationDetail orgInfo in allOrgs.Details)
   {               
     Console.Write(orgInfo.Endpoints[EndpointType.OrganizationService]);
   }

Console.ReadLine();

Sunday, August 16, 2009

Marking ActiveX Controls as Safe

What is ActiveX Controls?
A control using ActiveX technologies. An ActiveX control can be automatically downloaded and executed by a Web browser. ActiveX is not a programming language, but rather a set of rules for how applications should share information. Programmers can develop ActiveX controls in a variety of languages, including C, C++, Visual Basic, and Java.

Creating a Simple COM Component
Lets create a simple com component that will extract existing DSN of client system using .NET.
1. Create a File->New->Project->ClassLibrary Project. Name it DSNComComponent.
2. A default class "Class1.vb" is added to your project file. Here in this project we are not using this class so its better to delete.
3. Add a Com Class to your project. Name it DSNComponent. Paste following code


_
Public Class DSNComponent
#Region "COM GUIDs"
' These GUIDs provide the COM identity for this class
' and its COM interfaces. If you change them, existing
' clients will no longer be able to access the class.
Public Const ClassId As String = "5162d4b1-7440-4fa3-b47f-12906475728b"
Public Const InterfaceId As String = "22dd7975-2554-4d49-bc82-b54ef0d2409f"
Public Const EventsId As String = "eb56f021-5c97-4e71-a2de-67d6acd2f703"
#End Region
' A creatable COM class must have a Public Sub New()
' with no parameters, otherwise, the class will not be
' registered in the COM registry and cannot be created
' via CreateObject.
Public Sub New()
MyBase.New()
End Sub
Public Function GetDSNLists() As String
Return OdbcHelper.GetDSNLists()
End Function
End Class


4. Add module to your project. Name it OdbcHelper. Paste following code

#Region "Imports"
Imports System.Text
Imports System
Imports System.Runtime.InteropServices
#End Region
Module OdbcHelper
#Region "Variable Declaration"
Private Const SQL_HANDLE_ENV As Short = 1
Private Const SQL_SUCCESS As Short = 0
Private Const DEFAULT_RESULT_SIZE As Short = 1024
Private Const SQL_FETCH_NEXT As UShort = 1
Private Const SQL_MAX_DSN_LENGTH As Short = 1024
Private Const SQL_ATTR_ODBC_VERSION As Integer = 200
Private Const SQL_OV_ODBC3 As Integer = 3
Private Const SQL_HANDLE_CON As Short = 2
Private Hwnd As IntPtr
#End Region
#Region "API Calls / Declarations"
_
Private Function SQLDataSources( _
ByVal henv As System.IntPtr, ByVal fDirection As UShort, _
ByVal szDSN As StringBuilder, ByVal cbDSNMax As Short, _
ByRef pcbDSN As Short, ByVal szDescription As StringBuilder, _
ByVal cbDescriptionMax As Short, ByRef pcbDescription As Short _
) As Short
End Function
_
Private Function SQLAllocHandle(ByVal hType As Short, ByVal inputHandle As IntPtr, ByRef outputHandle As IntPtr) As Short
End Function
_
Private Function SQLSetEnvAttr(ByVal henv As IntPtr, ByVal attribute As Integer, ByVal valuePtr As IntPtr, ByVal strLength As Integer) As Short
End Function
_
Private Function SQLFreeHandle(ByVal inStringLength As Short, ByVal hconn As IntPtr) As Short
End Function
#End Region
#Region "API Method Invoke"
Friend Function GetDSNLists() As String
Dim nRc = 0
Dim txt As String = String.Empty
Dim henv As IntPtr = IntPtr.Zero
Dim hconn As IntPtr = IntPtr.Zero
Dim nDSNLen As Short
Dim inString As StringBuilder = New StringBuilder(1024)
Dim outString As StringBuilder = New StringBuilder(1024)
Dim lenNeeded As Short
Dim Inc As Integer = 0
Try
If SQL_SUCCESS = SQLAllocHandle(SQL_HANDLE_ENV, henv, henv) Then
If SQL_SUCCESS = SQLSetEnvAttr(henv, SQL_ATTR_ODBC_VERSION, CType(SQL_OV_ODBC3, IntPtr), 0) Then
Do Until nRc <> SQL_SUCCESS
nRc = SQLDataSources(henv, SQL_FETCH_NEXT, inString, SQL_MAX_DSN_LENGTH, nDSNLen, outString, SQL_MAX_DSN_LENGTH, lenNeeded)
If nRc <> SQL_SUCCESS Then
Exit Do
End If
If Inc = 0 Then
txt = inString.ToString()
Else
txt = txt & "," & inString.ToString()
End If
Inc += 1
Loop
End If
End If
Catch ex As Exception
MsgBox(ex.Message)
txt = String.Empty
Finally
If Not (henv = IntPtr.Zero) Then
SQLFreeHandle(SQL_HANDLE_ENV, hconn)
End If
End Try
Return txt
End Function
#End Region
End Module


5. Compile your code. A file DSNComComponent.dll should be created in your bin directory.

Using COM Component on HTML Page
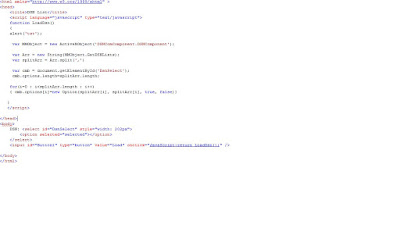
1. Create an empty HTML page. Add following code in your HTML file.


2. Open this html page in browser. You would be receiving an Error: Automation server can't create object.

3. Search Key HKEY_CLASSES_ROOT\CLSID\{5162D4B1-7440-4FA3-B47F-12906475728B} in your registry using regedit. Note that each COM component created in .NET application has different key value. This key value is available in your COM Class DSNComponent.vb.

4. Add two keys within {5162D4B1-7440-4FA3-B47F-12906475728B}
[HKEY_CLASSES_ROOT\CLSID\{5162D4B1-7440-4FA3-B47F-12906475728B}\Implemented Categories\{7DD95801-9882-11CF-9FA9-00AA006C42C4}]
[HKEY_CLASSES_ROOT\CLSID\{5162D4B1-7440-4FA3-B47F-12906475728B}\Implemented Categories\{7DD95802-9882-11CF-9FA9-00AA006C42C4}]
Key 7DD95801-9882-11CF-9FA9-00AA006C42C4 is used to mark controls that are safely scriptable.
Key 7DD95802-9882-11CF-9FA9-00AA006C42C4 is used to mark controls safely initializable from persistent data.


5. Browse your web page. Now DSN list would appear on your window.


Note: Don't use this method unless you have no other choice, and never use this method to mark as safe controls that aren't really safe.